How do you potato?
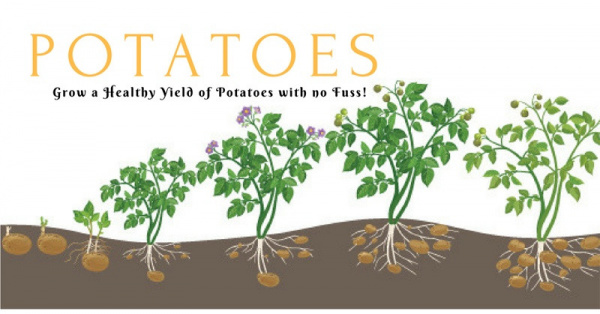
Nothing provides a greater sense of satisfaction quite like planting, growing and harvesting your very own potatoes. But how you potato is a very personal thing, coming down mainly to your climate, ground type and growing conditions. Producing this fantastic kitchen staple is easy, fun to grow, and great for the kids to get involved with. Lucky they store for months!
But what is the secret to growing good potatoes and having a plentiful harvest? Lets begin!
Always buy certified seed potatoes sourced from a local certified grower. Buying certified seed, ensures you are buying quality seed that is disease and virus free. While it may seem like a convenient idea to grab some potatoes from the local supermarket on your next grocery run, usually these potatoes have been treated with chemicals to reduce their sprouting tendencies.
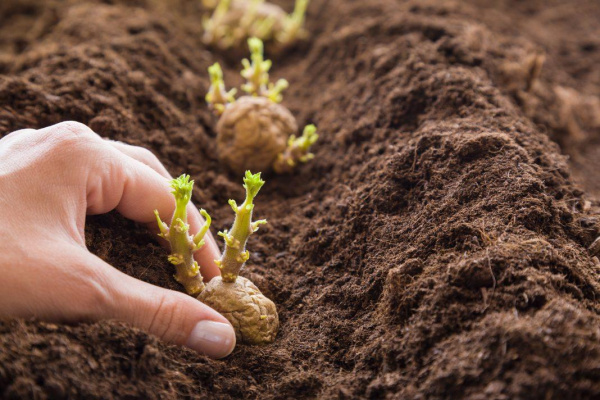
Before planting your seed potatoes, place them in a well lit area, out of direct sunlight, for a few weeks so they can develop small shoots. This process is called 'chitting'
Cutting your seed potatoes is not necessary to do before you plant them. It all comes down to personal preference. One major bonus of cutting your seed potatoes stretches your seed further, but it puts you at more risk of disease and rot. If you make the personal choice to cut your potatoes, each piece of potato must have one eye, it doesn't matter if it has more then one. Once cut, you can dust them with some Mancozeb or leave them to cure in a cool, humid spot for 2-3 days. After you have cured the spuds, they should be planted as soon as possible.
Choose a nice sunny spot in your veggie garden, make sure you choose a spot that is well draining. You can enrich your ground with a quality compost or composted manure to make your ground a better growing environment.
Dig holes or one continuous trench 10-15cm deep and plant your seeds with the eyes facing upwards. Back fill with soil and water in well.
Congratulations! If you've made it this far, you will be rewarded with potatoes in around 3-4 months time.
As shoots appear above ground level, cover them with some soil from either side of the hole or trench and water well. Covering with soil from the side of your hole or trench helps with run off so your potatoes don't get wet feet! Covering as you go also protects your tubers from sunlight, preventing them from going green.
Keep covering your mound until it is around 60cm tall. You can also cover your mound with straw mulch, or sugarcane mulch. To boost your yield, fertilse your crop fortnightly and follow with a good watering.
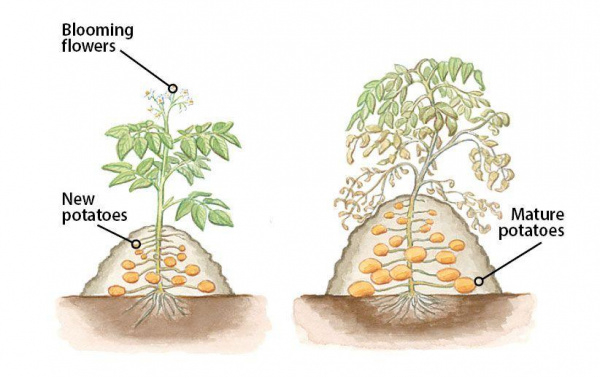
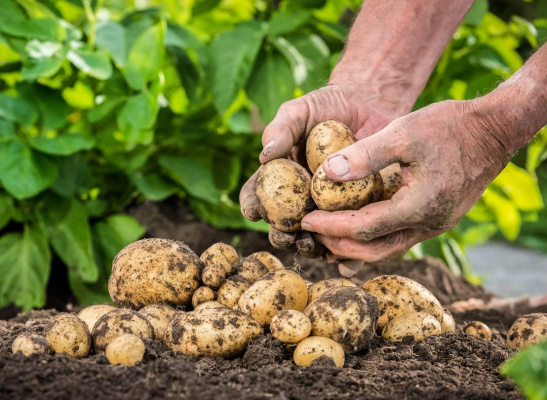
Once your plants have flowered and died down, your potatoes are now ready to harvest! Although you can bandicoot small potatoes before hand by carefully digging below the plant and extracting any of a good, usable size.
Don't be tempted to over water your potatoes as they are growing, they do not require much water while growing, and only need a light water when you add soil or mulch to the mound. If you're experiencing a particularly hot spell, then water as needed.
You don't need to harvest all your potatoes at once. You can harvest them as you choose, use the larger ones first. Leave the remainder in the ground, however if your preference is to harvest at at once, then be sure to store them in a cool, dry and dark place.
Don't eat green potatoes as they are poisonous! Potatoes become green when exposed to sunlight so ensuring you store them correctly!
Rotate the position of your potatoes and avoiding planting them in the same position as last years tomatoes. This rotation will help prevent the accumulation of any soil borne diseases that potatoes and tomatoes share.
If you want more tips and tricks to growing great potatoes, be sure to call into the Tasmulch Nursery local knowledge and great service!